Creating a Photogrammetry Mission
A Photogrammetry Mission is used to capture a series of overlapping aerial images for generating high-resolution orthomosaics, 3D models, digital surface models (DSM), and other mapping products.
The Mission Planner provides a guided workflow that allows operators to define the survey area, configure the mission, assign an aircraft, and prepare the mission for execution.
Step 1: Create a New Mission
From the Mission Planner:
-
Click Add Route / Mission.
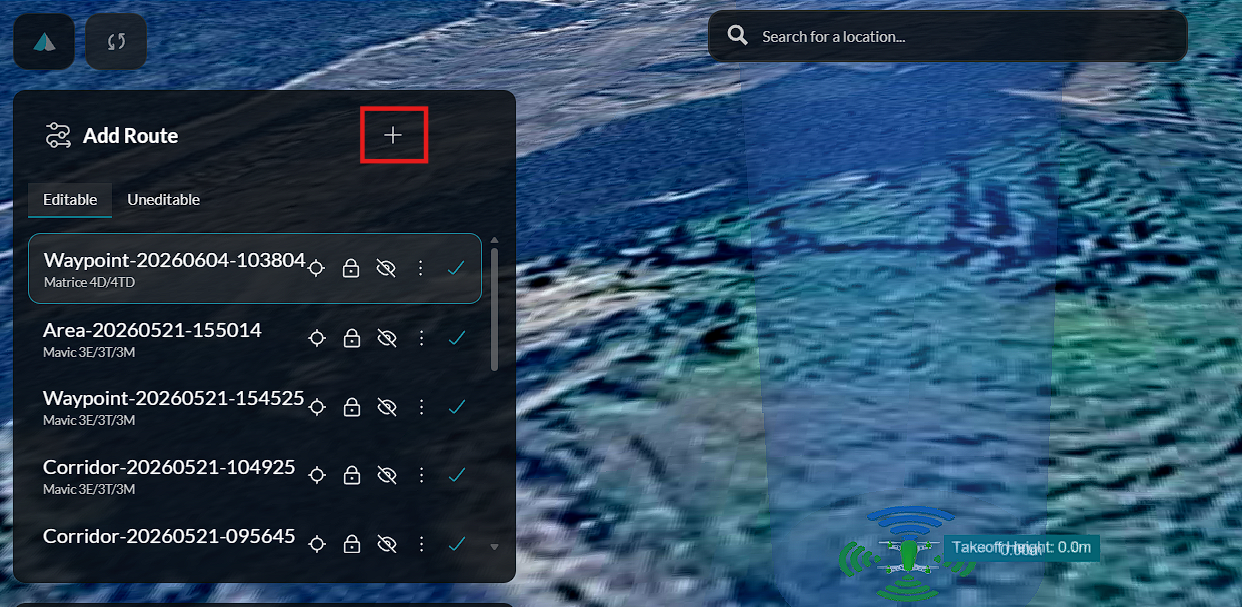
This opens the mission creation wizard where the mission type can be selected.
Step 2: Select the Mission Type
The platform supports multiple mission types.
For aerial mapping:
-
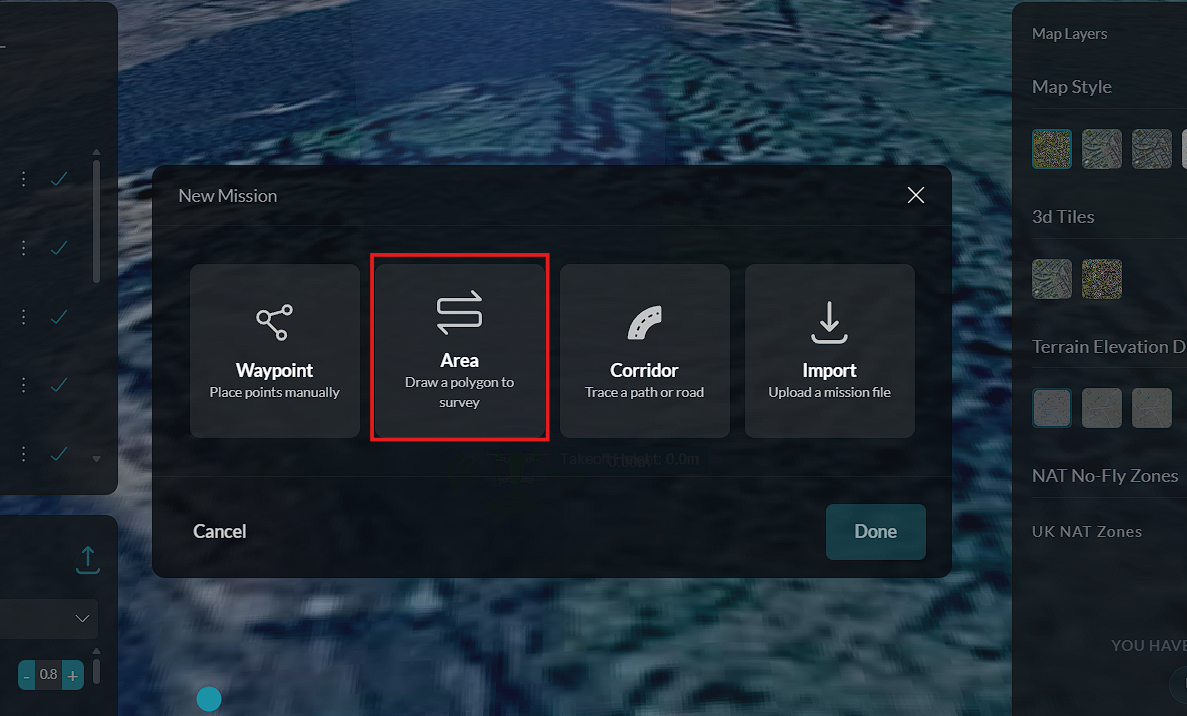
Select Area Mission.
-
Choose Photogrammetry.
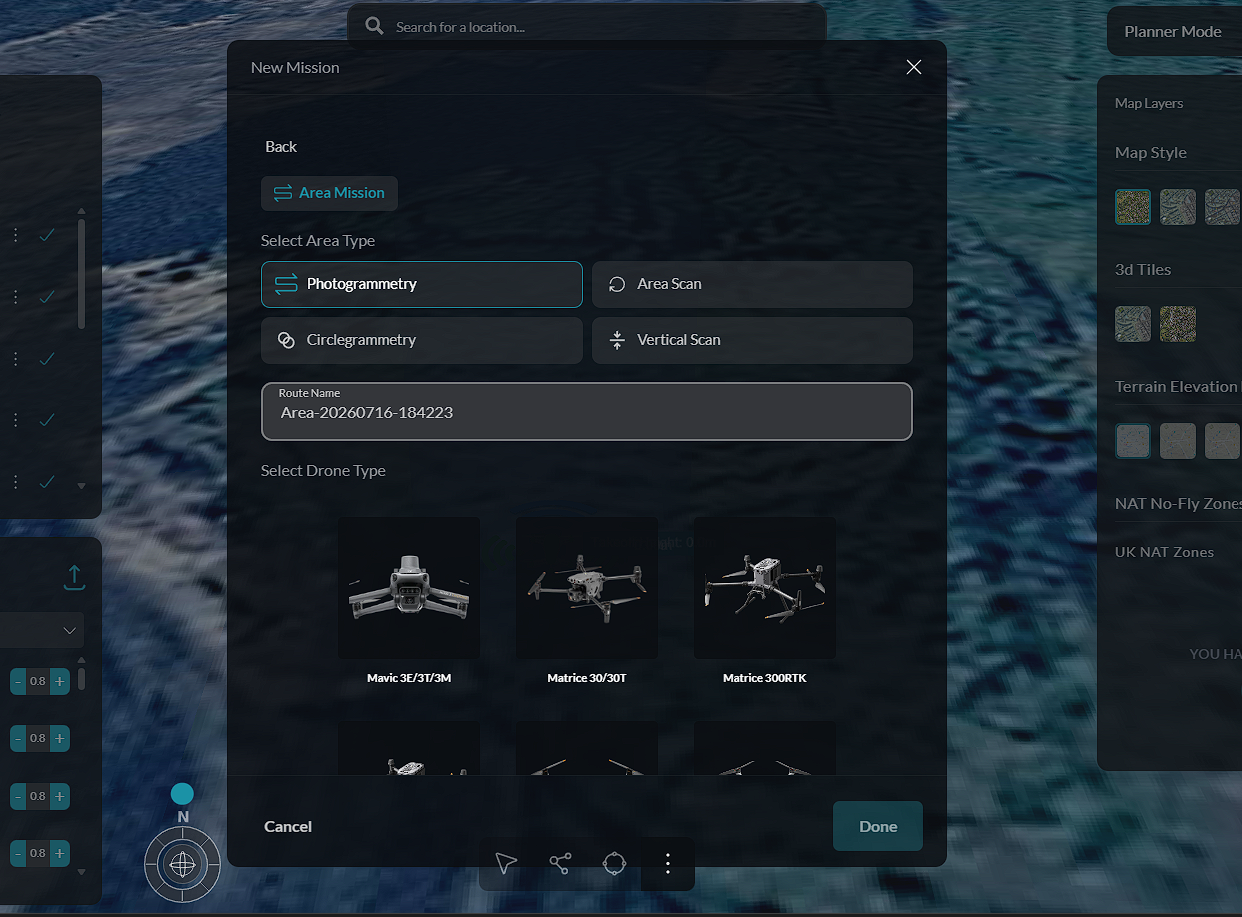
The planner creates a new photogrammetry mission and opens the configuration workspace.
Step 3: Enter Mission Details
Provide the basic mission information.
This includes:
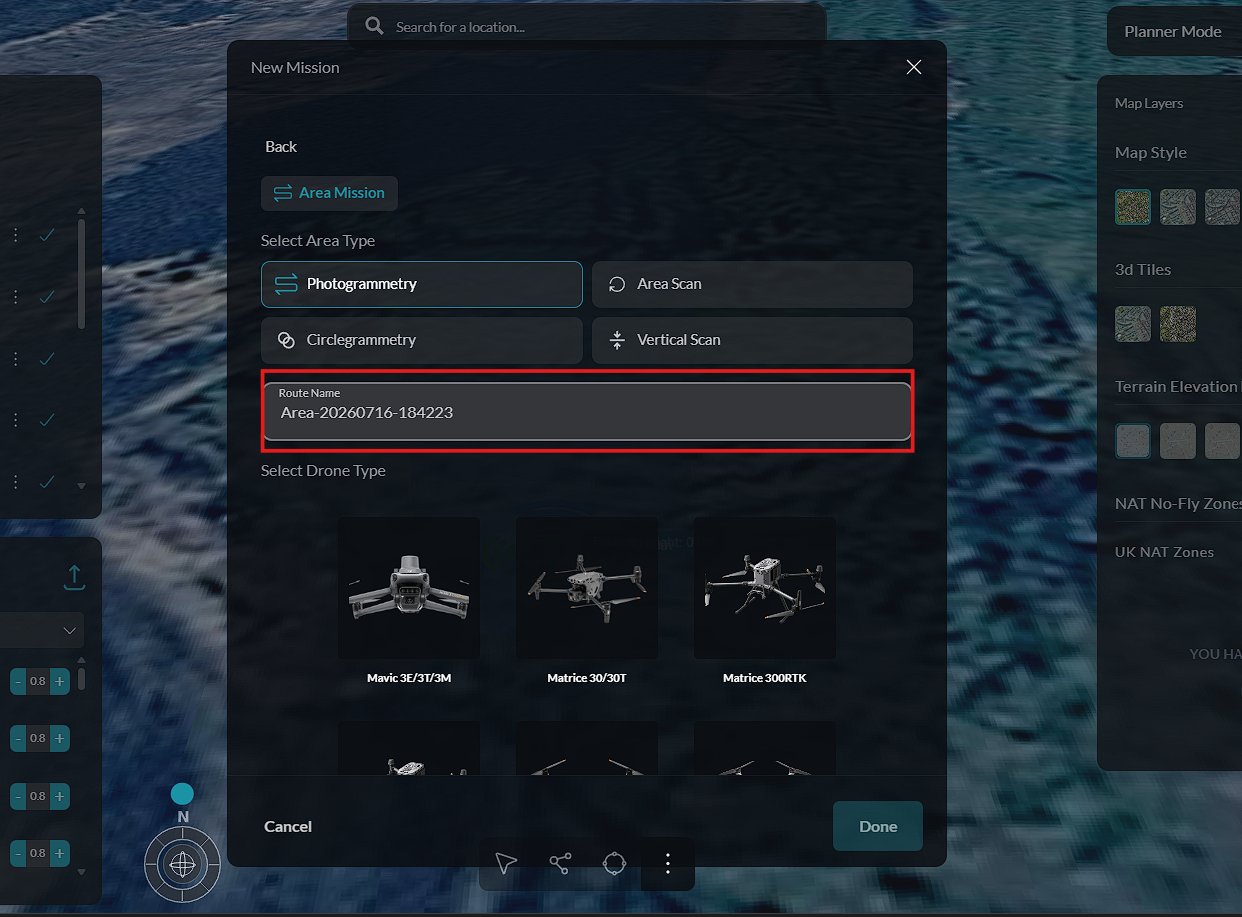
- Mission Name
- Mission Description (optional)
- Additional mission information where applicable
Choose a descriptive name that clearly identifies the survey area or project.
Step 4: Select a Device
Choose the aircraft that will perform the mission.
The available devices are displayed in the device selection list.
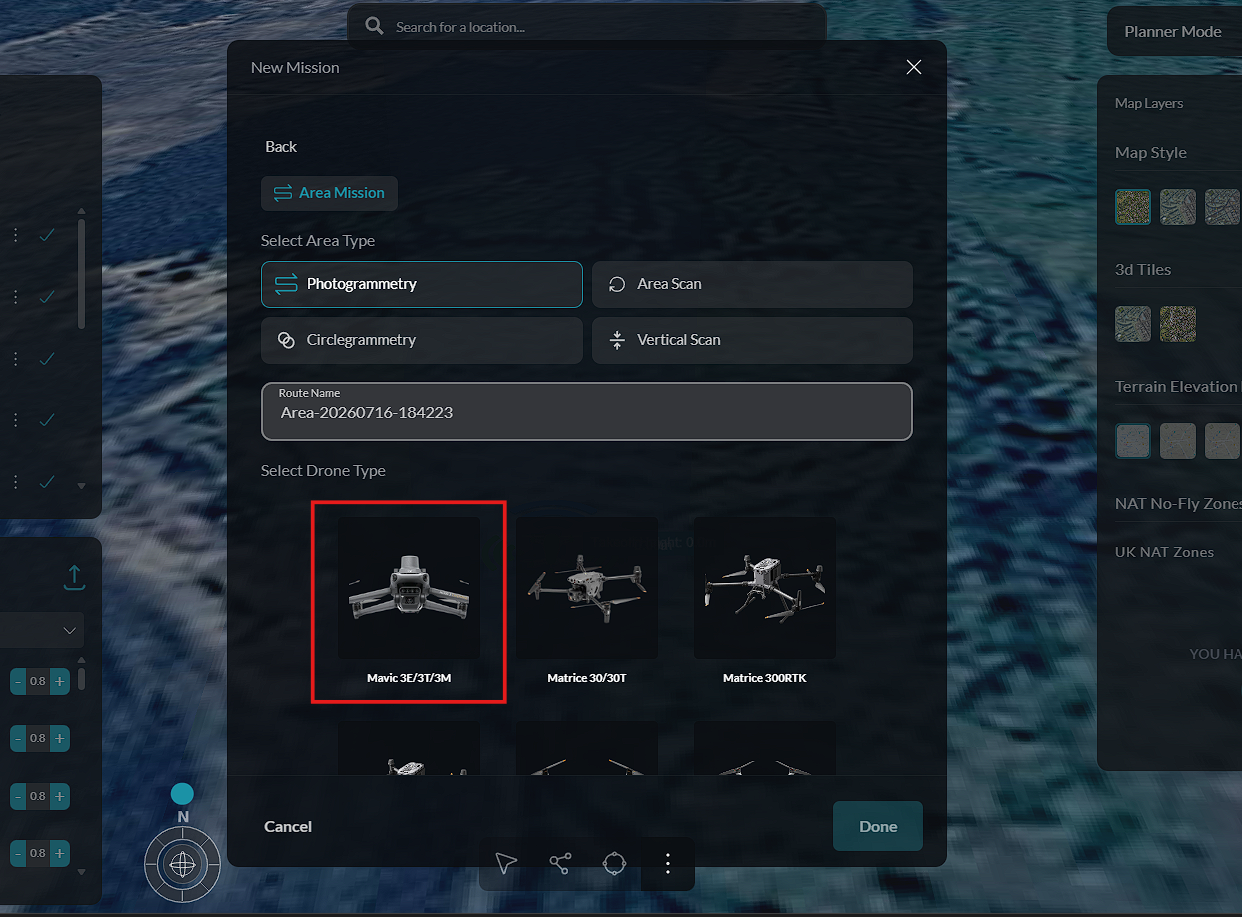
Select the appropriate aircraft and continue.
After selecting the device, click Done.
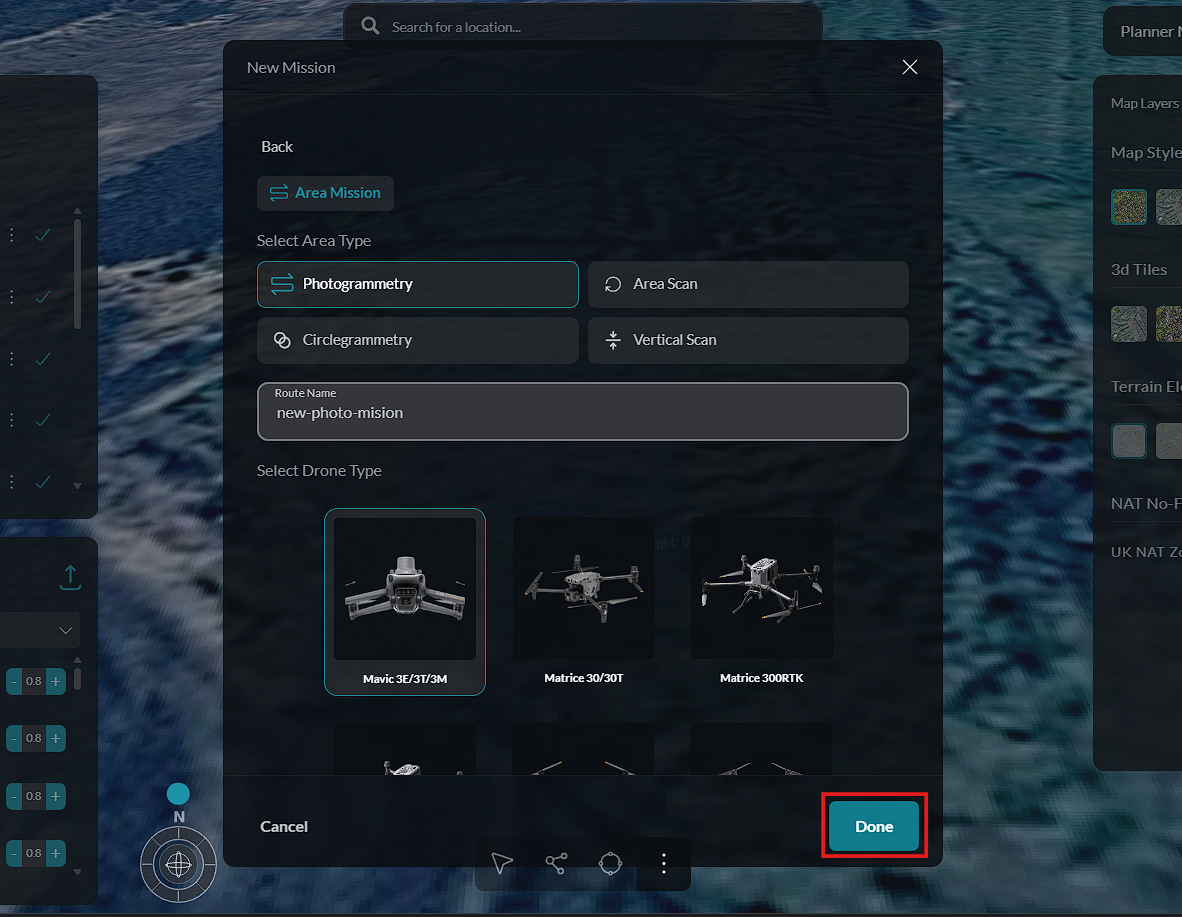
The mission is now associated with the selected aircraft.
Step 5: Display the Mission Route
Once the mission has been created, the new mission appears in the mission list.
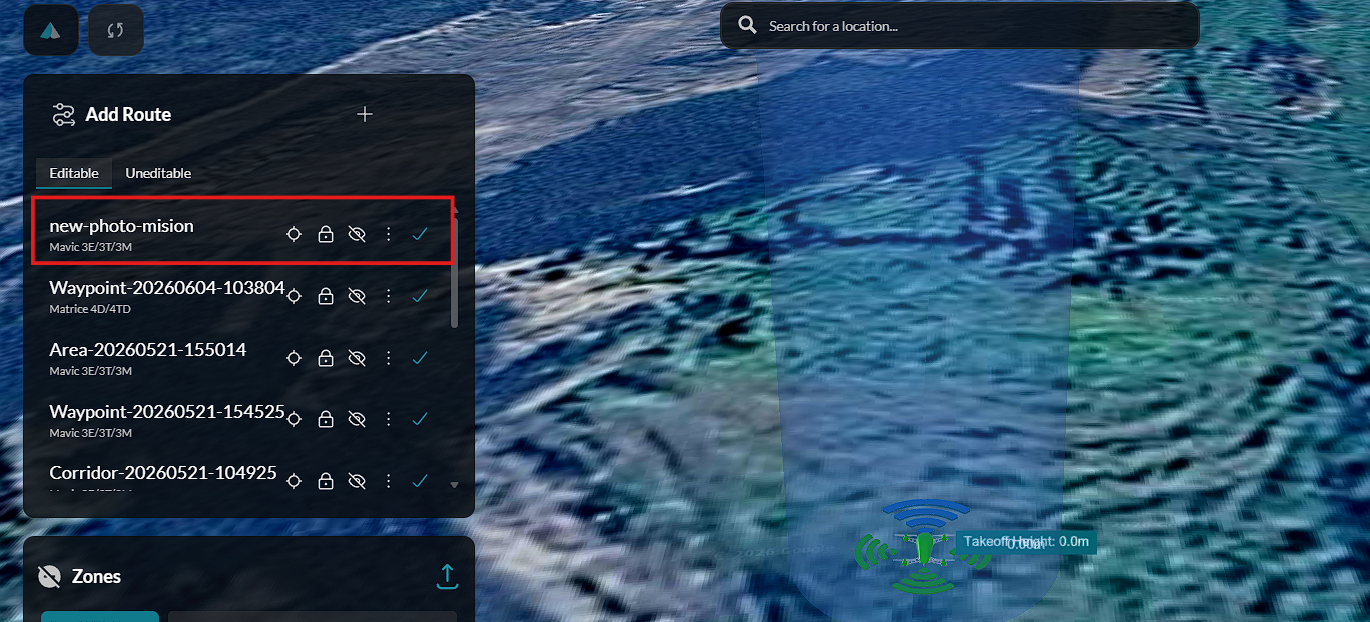
Enable the route visibility option to display the mission on the planning map.
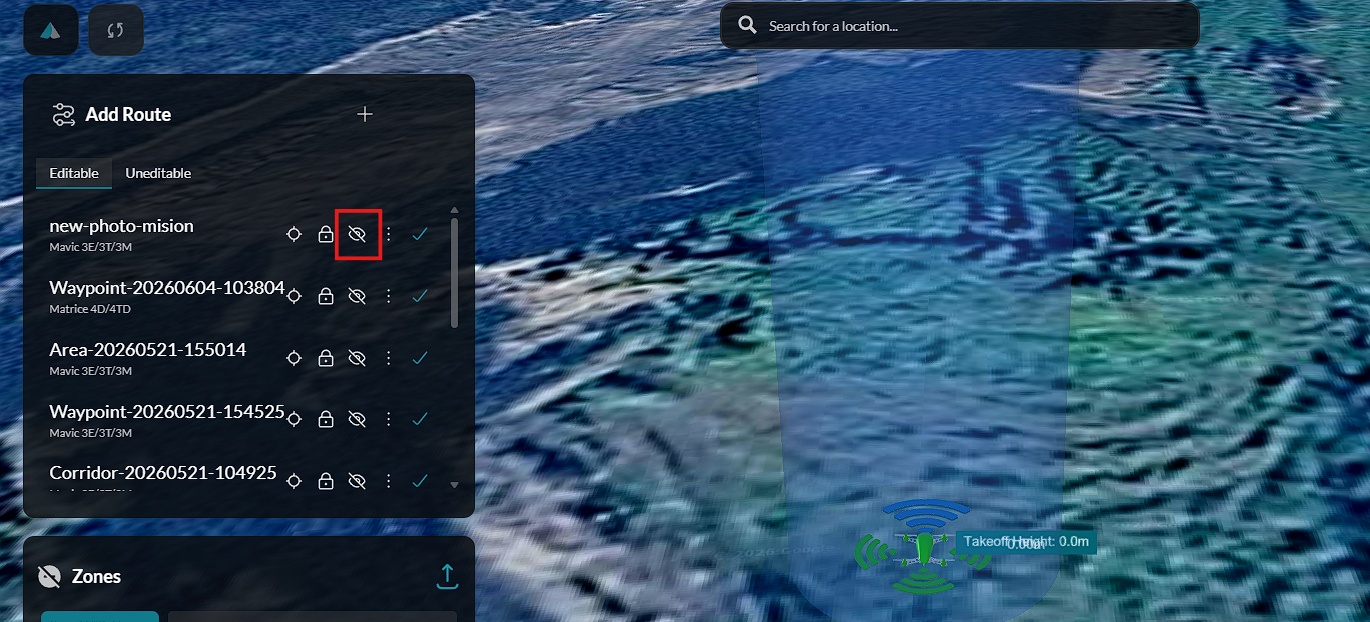
The route becomes visible, allowing the operator to review and edit the mission before deployment.
Step 6: Unlock the Mission for Editing
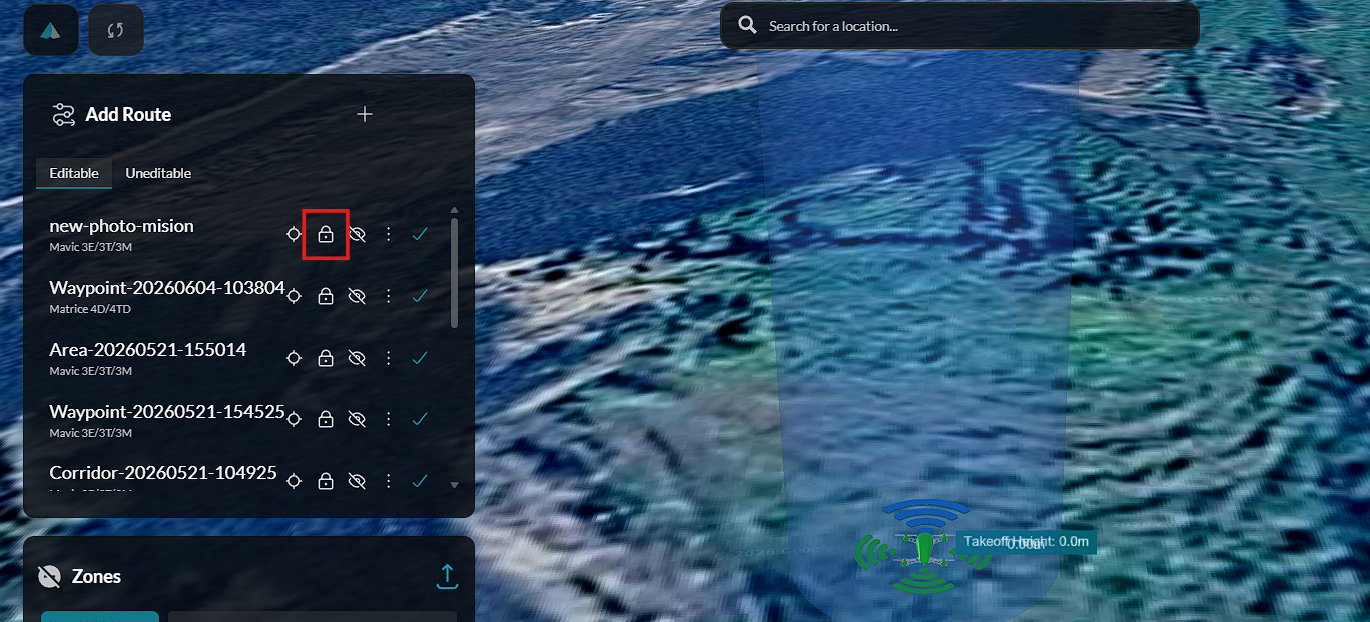
Newly created missions are initially locked to prevent accidental modifications.
To begin editing:
-
Click Unlock to Edit.
-
The planning tools become available.
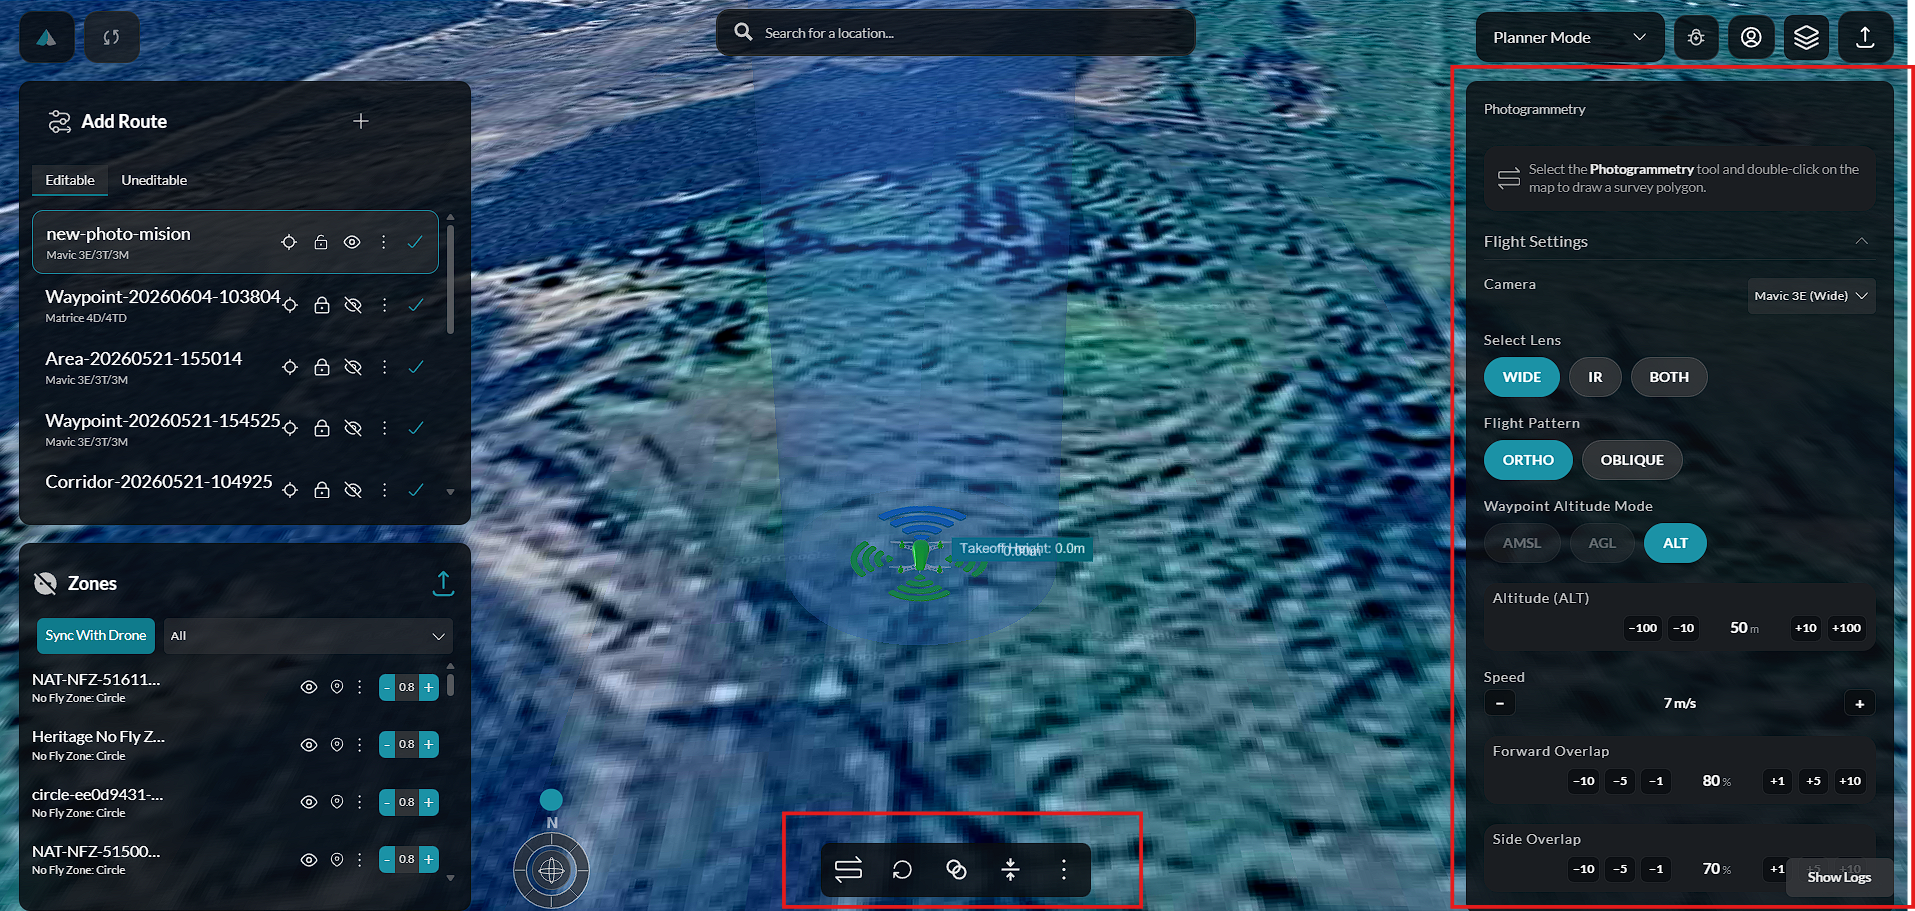
Mission parameters and flight actions can now be modified.
Step 7: Define the Survey Area
To create the survey boundary:
-
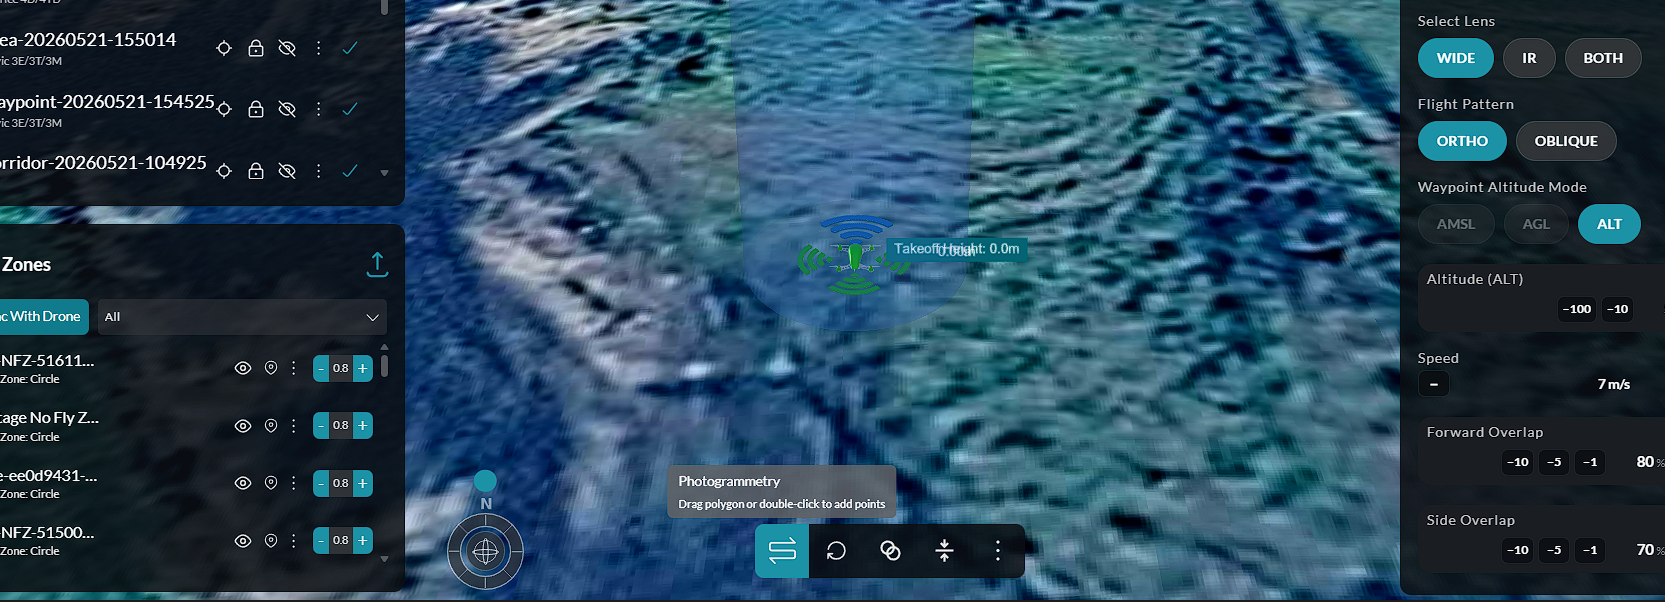
Select the Polygon drawing tool.
-
Click Enable Polygon.
-
Double-click on the map to place each boundary point.
-
Continue adding points until the survey area is completely enclosed.
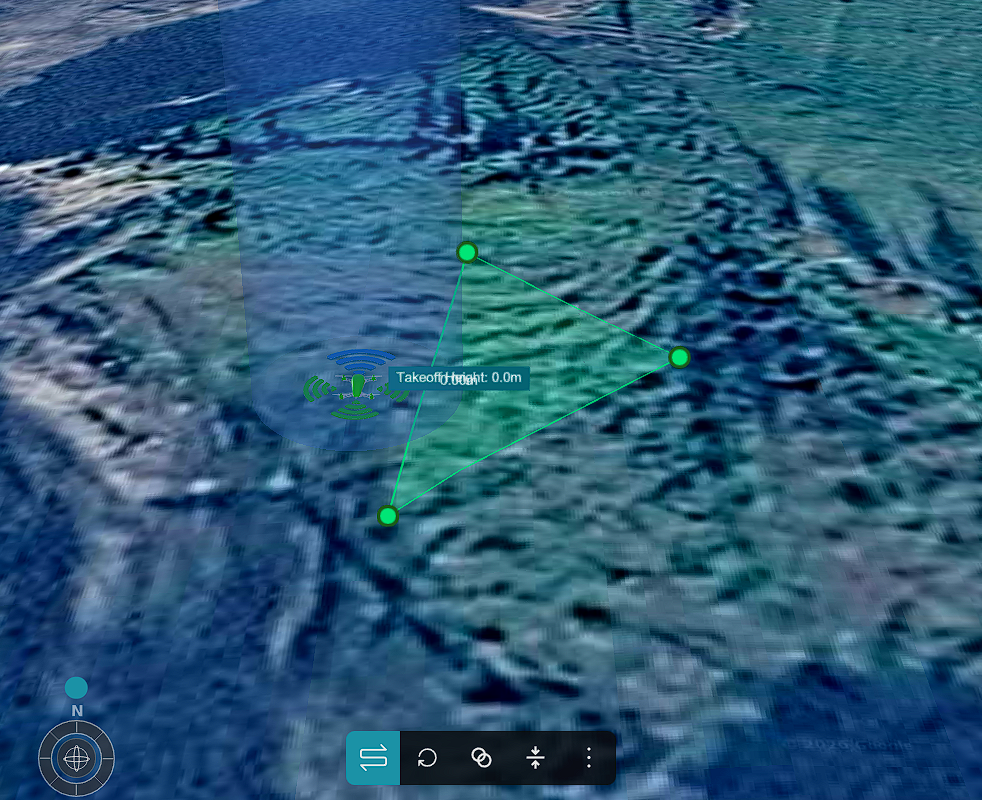
A minimum of three points is required to create a polygon.
Additional points can be added to accurately follow the shape of the survey area.
Each point can be dragged to adjust the polygon after it has been created.
Step 8: Configure Photogrammetry Settings
Once the survey area has been defined, configure the photogrammetry parameters.
Typical settings include:
- Flight altitude
- Image overlap
- Side overlap
- Flight direction
- Camera angle
- Ground Sampling Distance (GSD)
- Capture settings
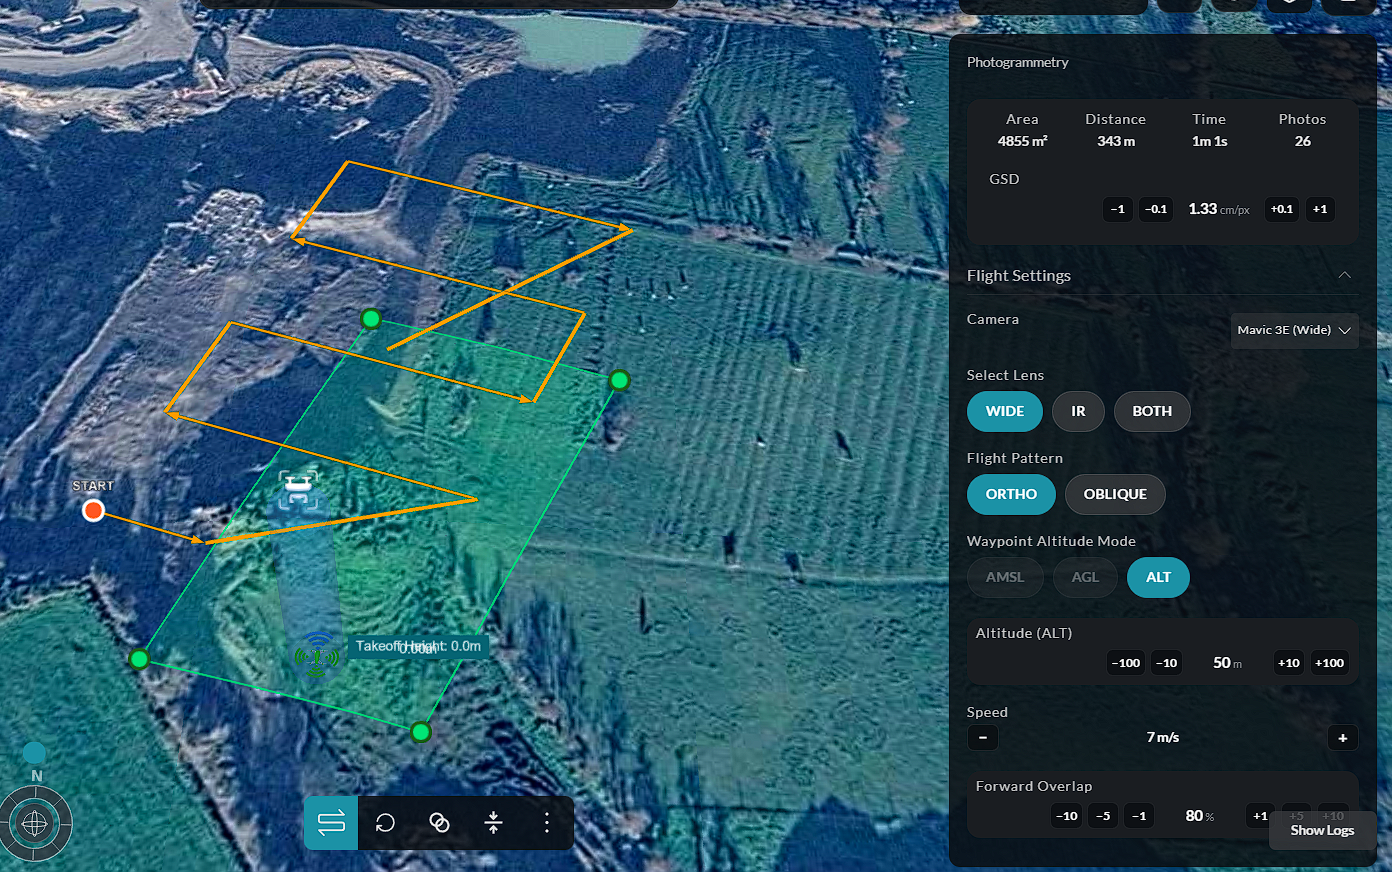
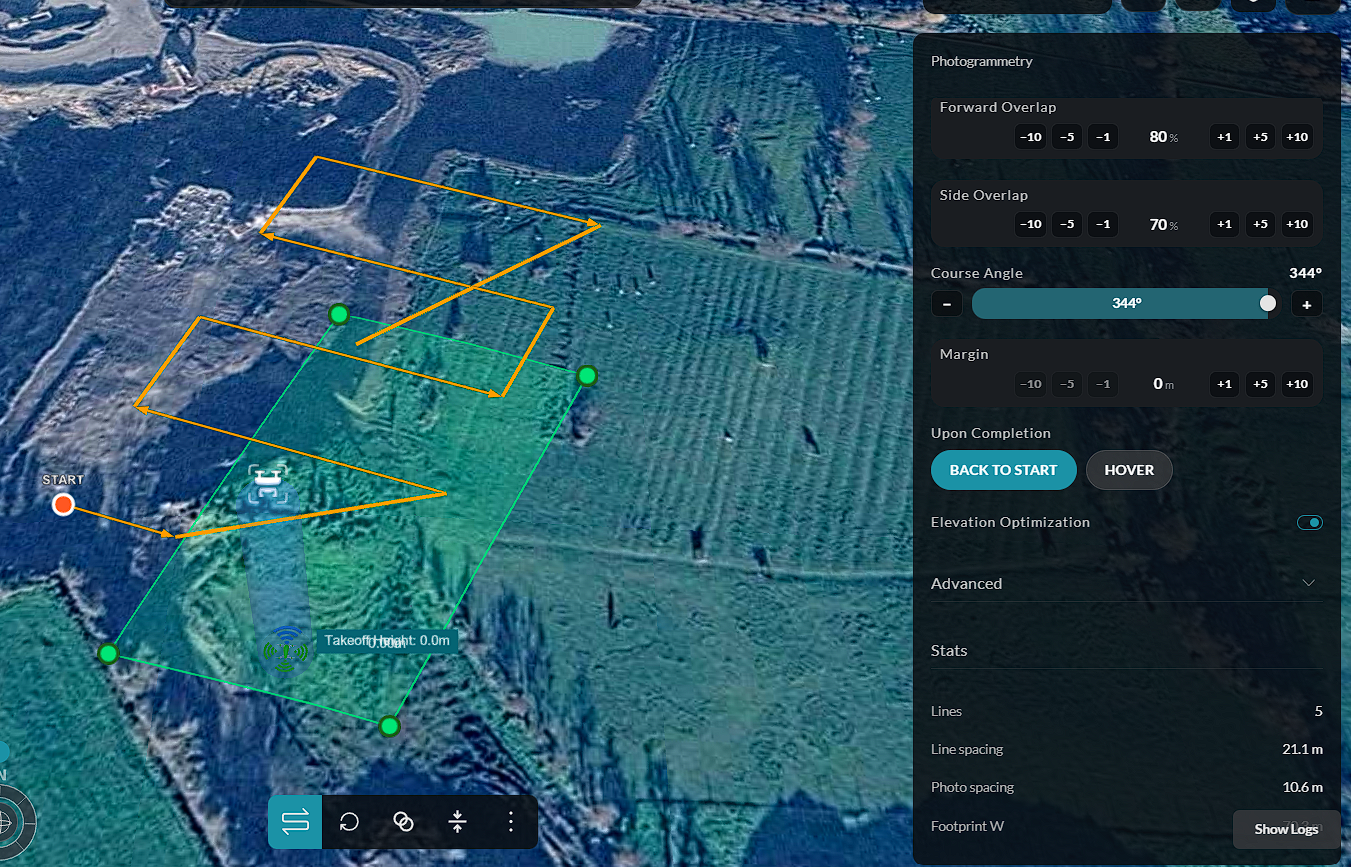
Adjust these parameters to achieve the required image quality and mapping accuracy.
As settings are modified, the mission preview updates to reflect the planned flight path.
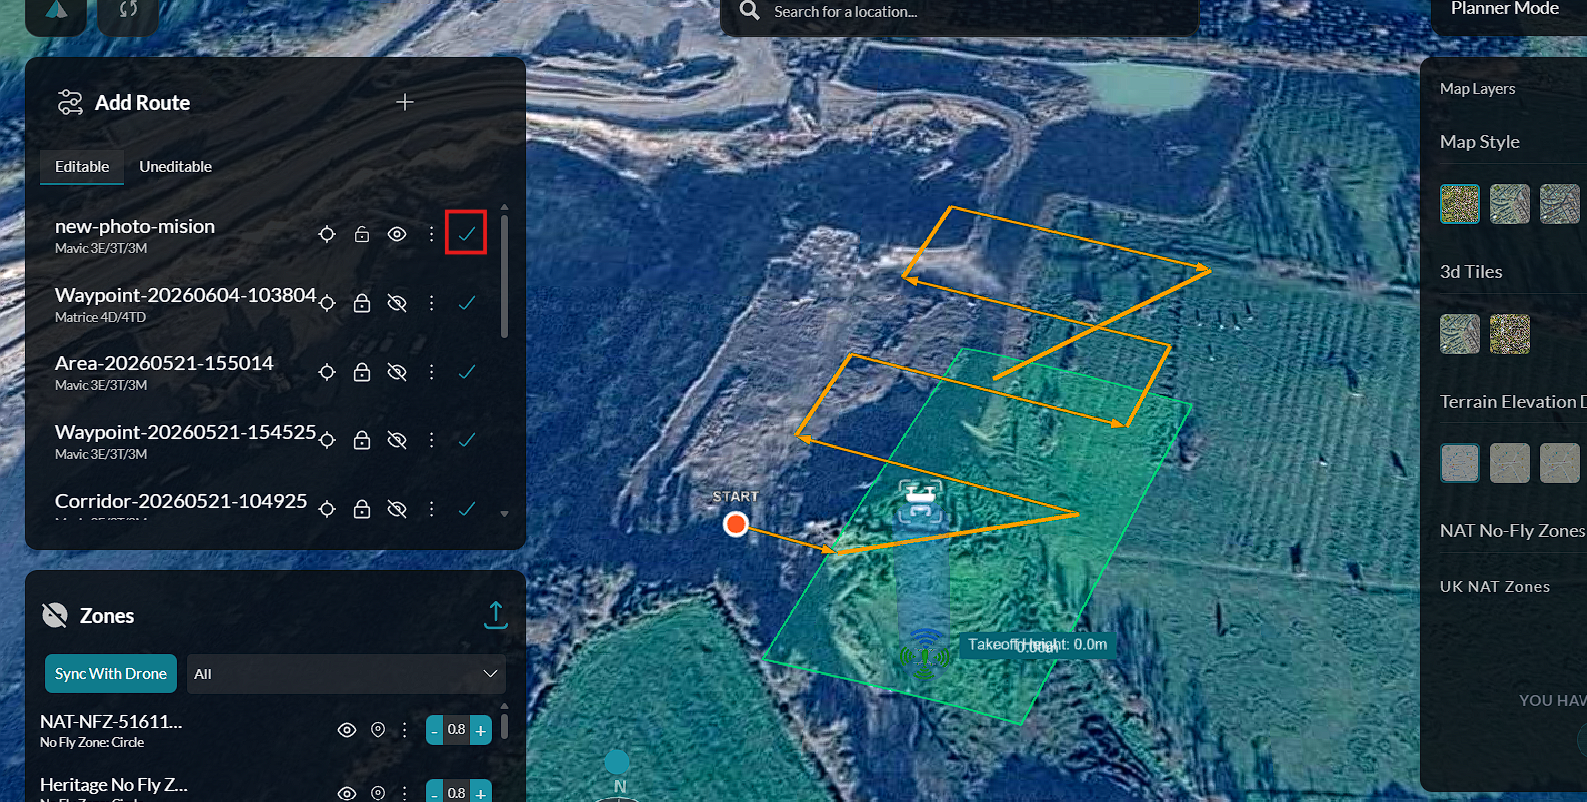
Step 9: Save the Mission
After reviewing the route and photogrammetry settings:
-
Click Save.
-
The mission is stored in the Mission Planner.
The mission is now available for execution.
Exporting a Mission
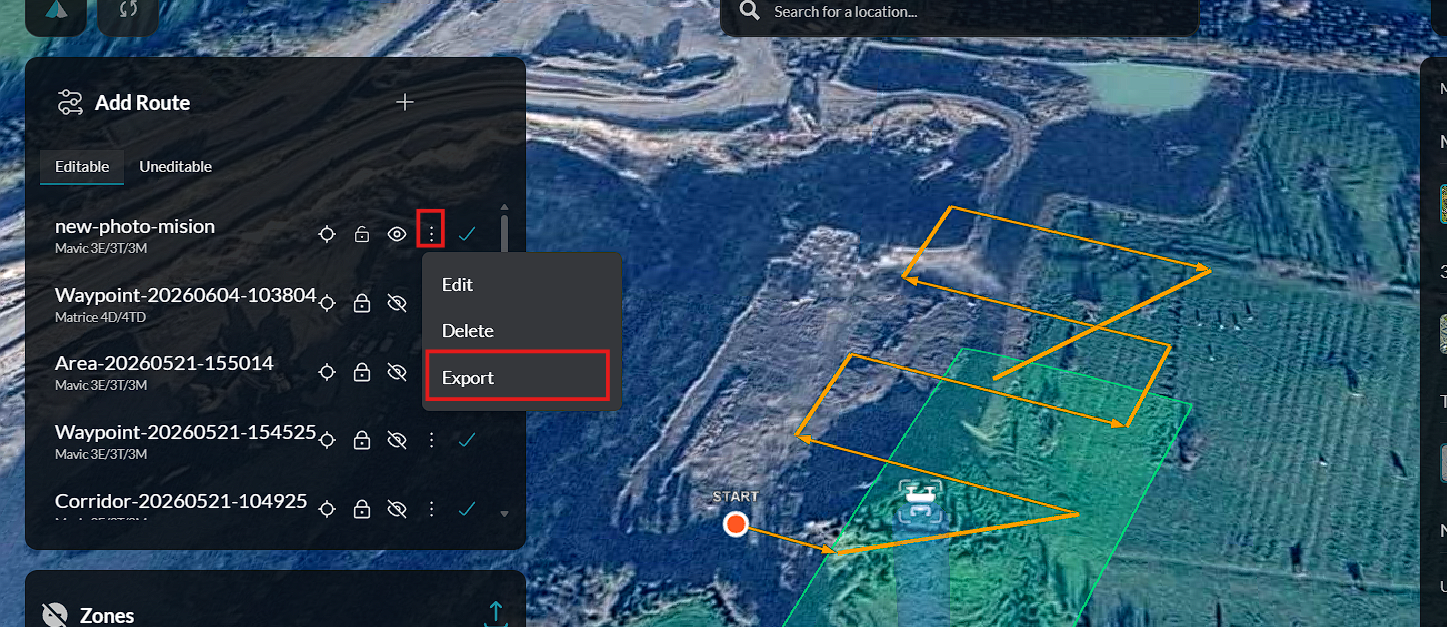
Saved photogrammetry missions can be exported for external use or backup.
To export a mission:
- Locate the saved mission in the mission list.
- Click the Export option.
- The mission data is downloaded in the supported format.
Deleting a Mission
If a mission is no longer needed, it can be removed from the mission list.
To delete a mission:
- Locate the mission in the mission list.
- Click the Delete option.
- Confirm the deletion when prompted.
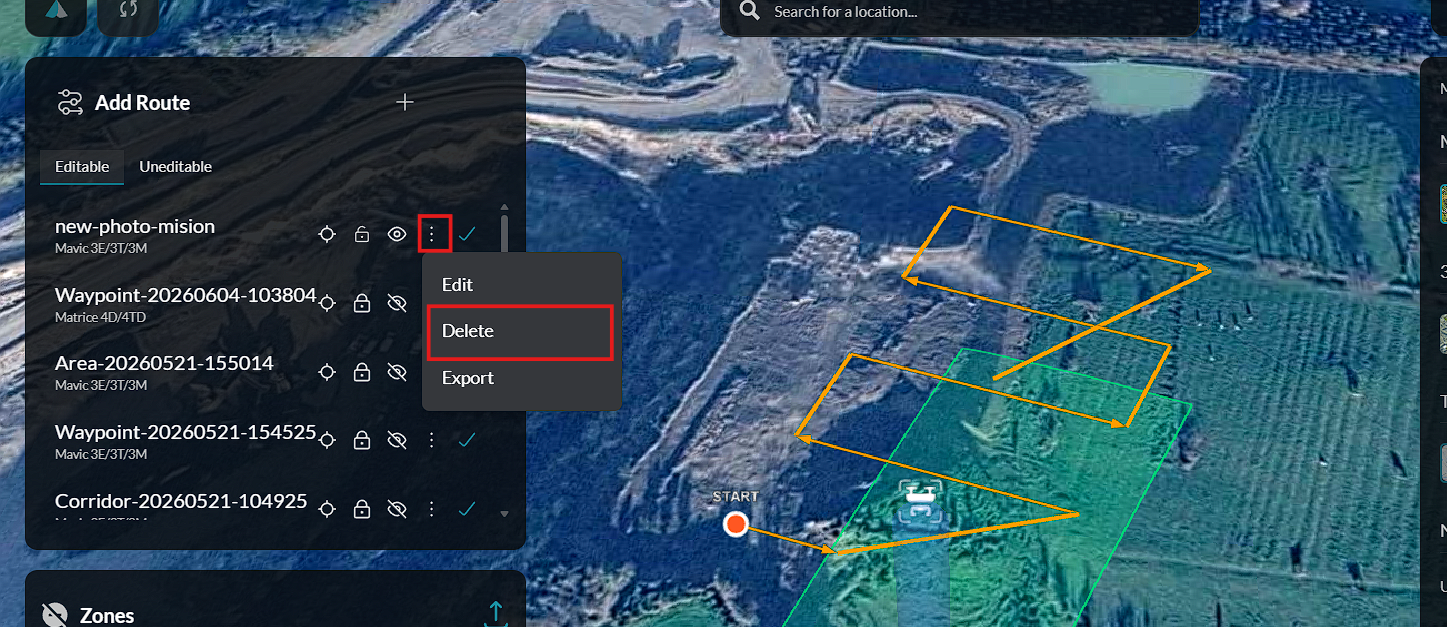
Deleted missions cannot be recovered.
Step 10: Launch the Mission
To prepare the mission for flight:
- Return to Fly Mode.
- Locate the saved mission.
- Perform the required pre-flight checks.
- Launch the mission.
The aircraft will execute the planned photogrammetry route automatically using the configured flight parameters.