Virtual Stick Control
Virtual Stick Control lets you fly the drone manually from your computer using a keyboard or a physical game controller, without needing a physical DJI remote. It is useful for inspections, repositioning, and test flights when an RC is not available.
What Virtual Stick Does
When Virtual Stick is enabled the dashboard sends continuous velocity commands to the aircraft over MQTT using the DJI MSDK virtual stick API. The drone responds as if being flown by a real remote controller, subject to the speed and altitude limits set on the device.
Virtual Stick requires a stable, low-latency connection. Do not use it in high-latency network conditions. Ensure a failsafe action is configured before enabling Virtual Stick so the drone can recover if the connection drops mid-flight.
Supported Input Devices
| Controller | How It Connects |
|---|---|
| Keyboard | No hardware needed — uses your computer keyboard |
| Xbox | Xbox One or Series X/S via USB or Bluetooth |
| ThrustMaster | ThrustMaster T.16000M joystick via USB |
| DJI FPV | DJI FPV Remote Controller via USB |
Physical controllers (Xbox, ThrustMaster, DJI FPV) are auto-detected when plugged in. The dashboard reads the gamepad ID from the browser and selects the correct input mapping automatically.
Enabling Virtual Stick
- Ensure the drone is airborne and connected.
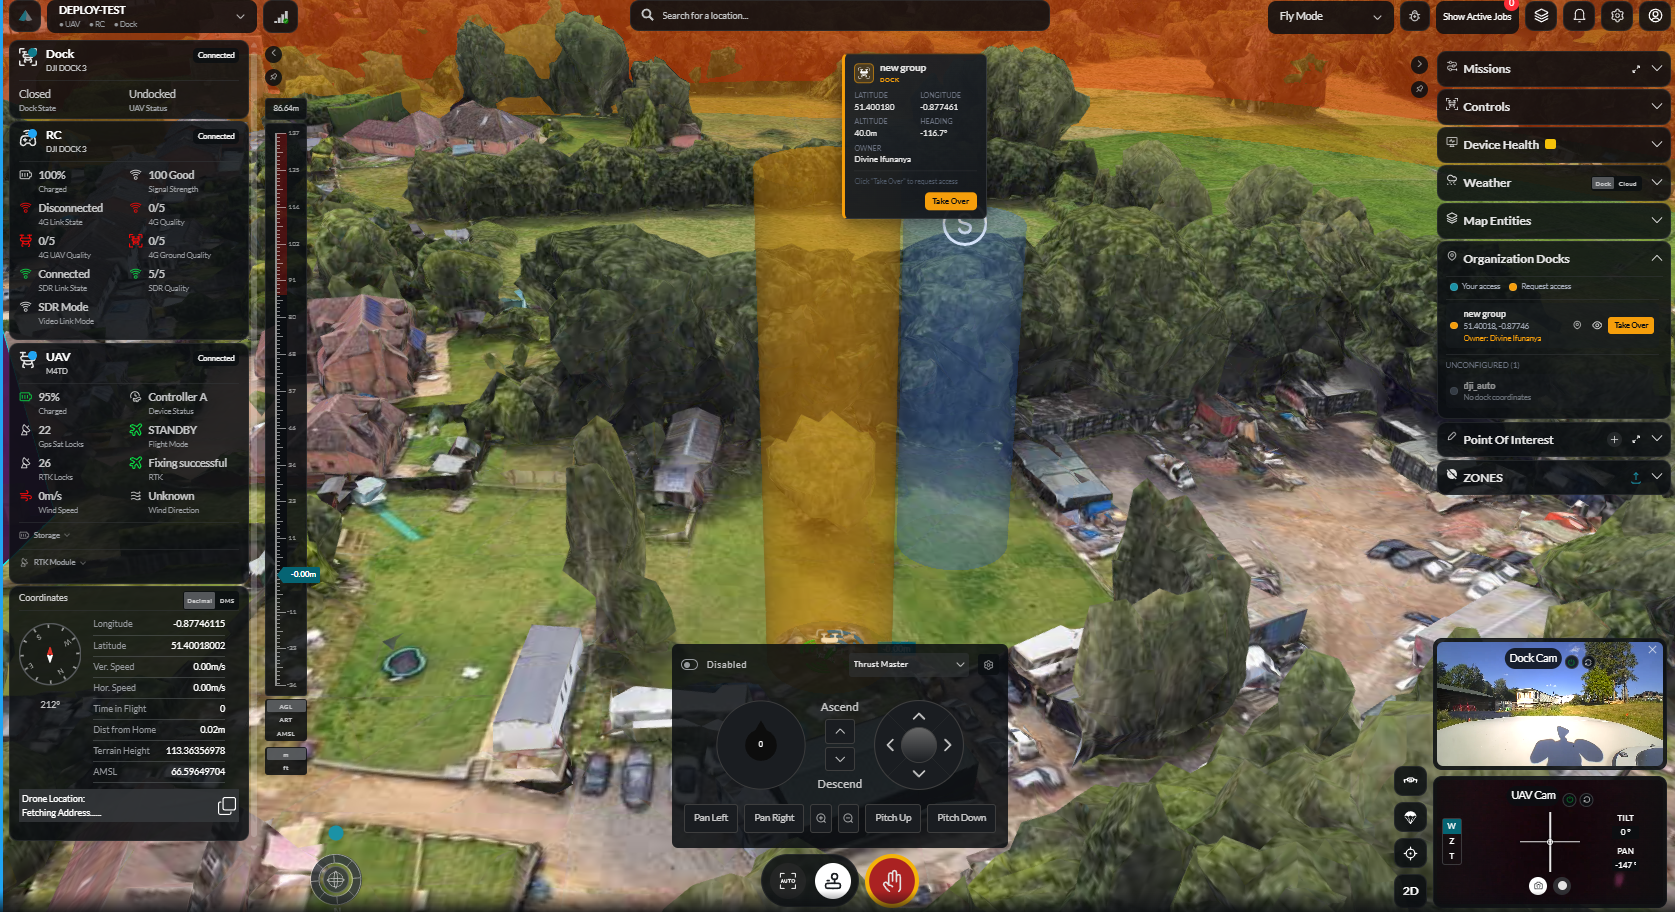
- Open the Virtual Stick / Controller panel from the sidebar or control bar.
- Select your input device from the controller dropdown if it was not auto-detected.
- Toggle Virtual Stick on. The drone is now under your manual control.
To disable, toggle Virtual Stick off. The drone transitions back to hover mode. If you triggered Virtual Stick from an E-Stop action (Take Manual Control), disabling it returns command authority to the dashboard.
Keyboard Controls
When Keyboard is selected as the controller, the following keys are active whenever Virtual Stick is enabled:
Flight Controls
| Key | Action |
|---|---|
W | Fly forward (pitch forward) |
S | Fly backward (pitch backward) |
A | Fly left (roll left) |
D | Fly right (roll right) |
Q | Rotate left (yaw counter-clockwise) |
E | Rotate right (yaw clockwise) |
Shift | Increase altitude (throttle up) |
Space | Decrease altitude (throttle down) |
Gimbal Controls
| Key | Action |
|---|---|
Arrow Up | Tilt gimbal up |
Arrow Down | Tilt gimbal down |
Arrow Left | Pan gimbal left |
Arrow Right | Pan gimbal right |
Long-Press Actions
Hold the following keys for at least 0.5 seconds to send these commands:
| Key (hold) | Action |
|---|---|
K | Return to dock (sends GOTODOCKINGSTATION command) |
L | Land at current position |
Releasing the key before 0.5 seconds cancels the command.
Gimbal Controls (All Controllers)
Gimbal tilt and pan are controlled by the keyboard arrow keys (see above) or by equivalent sticks/axes on gamepad controllers. Dashboard gimbal controls can also be toggled on or off independently of Virtual Stick using the Use Dashboard Gimbal Controls setting.
Camera Controls
Camera functions (take photo, toggle camera mode, adjust zoom) are available from the controller panel buttons when Virtual Stick is active. These use the MQTT camera control commands sent to the connected aircraft.
Keyboard Layout

Xbox Controller Layout

ThrustMaster Layout

DJI FPV Layout

Notes and Limitations
- Keyboard Virtual Stick is disabled automatically if an active waypoint mission is running (the mission takes priority).
- Gamepad auto-detection requires a browser that supports the Gamepad API (Chrome and Edge are recommended).
- If a connected gamepad is not recognised, select the controller type manually from the dropdown.
- Keyboard control speed increments are fixed. Speed scaling behaviour varies by aircraft model.