Share Dialog
The Share Dialog provides a centralized interface for sharing platform resources with users, groups, viewer links, or share groups. It allows authorized users to locate a resource, select the appropriate recipients, assign permissions, and manage access from a single workflow.
Accessing the Share Dialog
Navigate to:
Settings → Share Dialog
The page displays a list of resources available for sharing.
Selecting a Resource Type
At the top of the page is the Resource Type selector. This dropdown determines which category of resources is displayed.
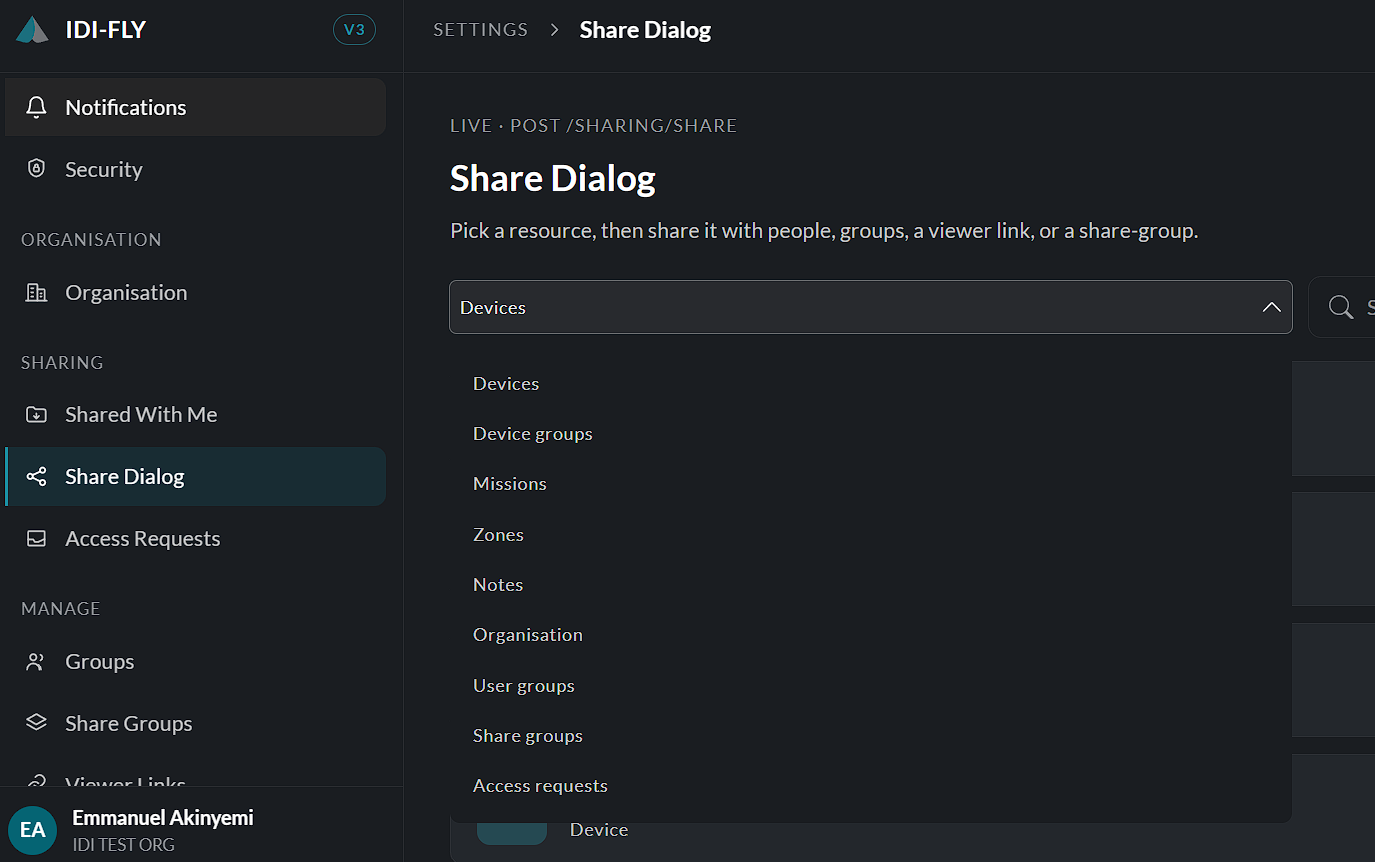
The available resource types include:
- Devices
- Device Groups
- Missions
- Zones
- Notes
- Organisation
- User Groups
- Share Groups
- Access Requests
Selecting a resource type refreshes the list to display only resources belonging to that category.
Searching for Resources
A search field is provided beside the resource type selector to quickly locate a specific resource.
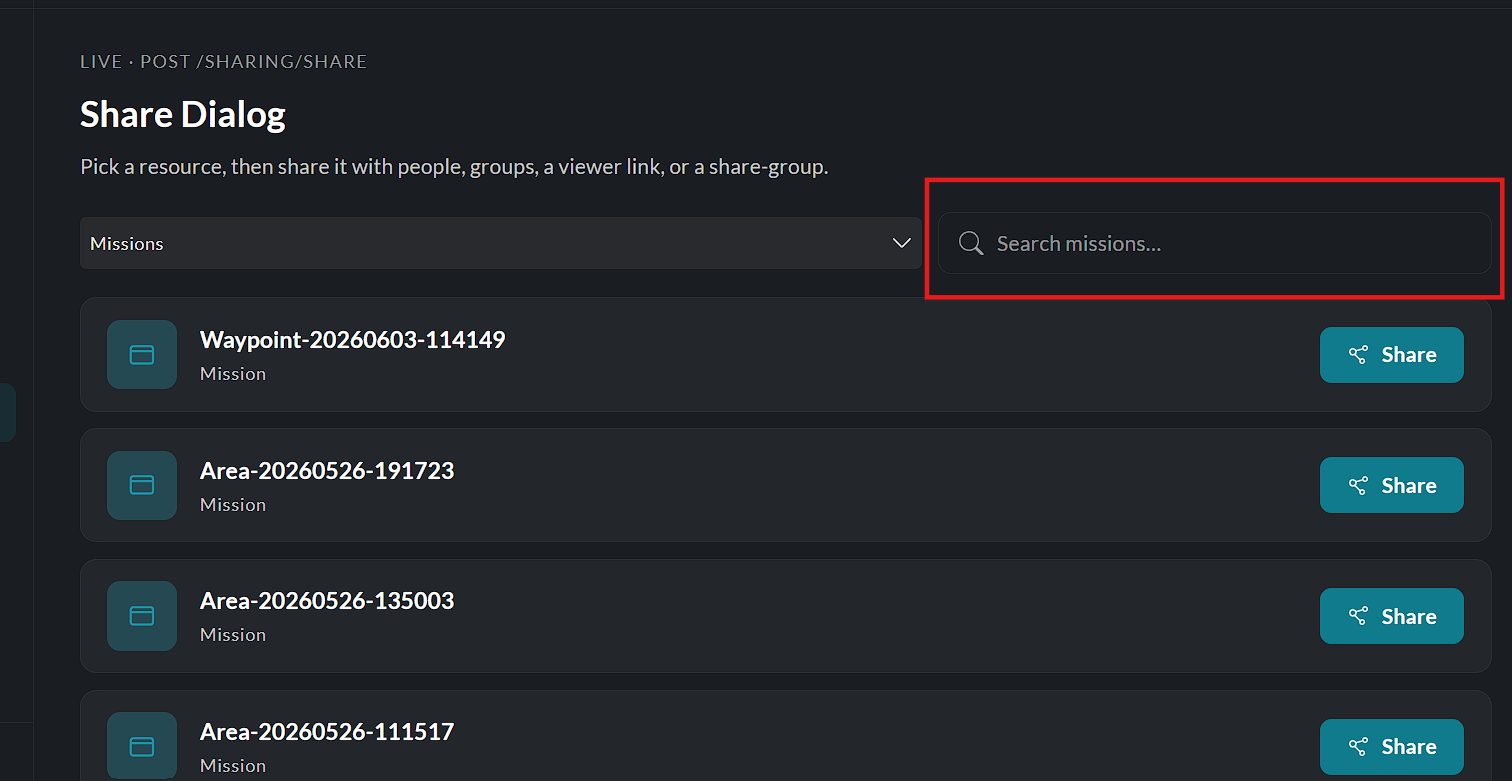
Enter part or all of the resource name to filter the list.
Sharing a Resource
Each resource displayed in the list includes a Share button.
To begin sharing:
- Select the required resource type.
- Locate the resource using the search field or browse the list.
- Click Share beside the desired resource.
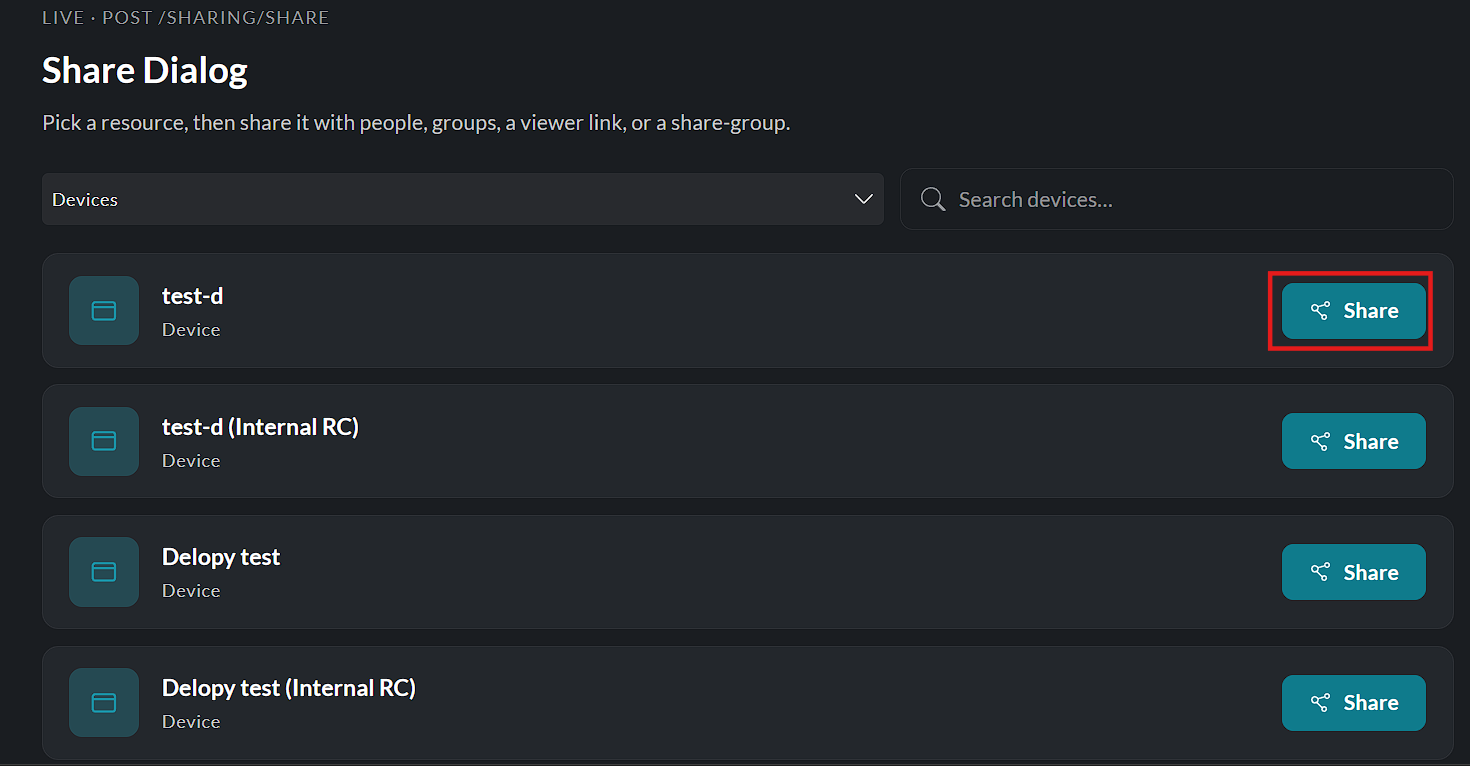
Clicking Share opens the sharing workflow, where recipients and permissions can be configured before access is granted.
Note: The resources available for sharing depend on the user's permissions and role within the organisation.
Selecting Recipients
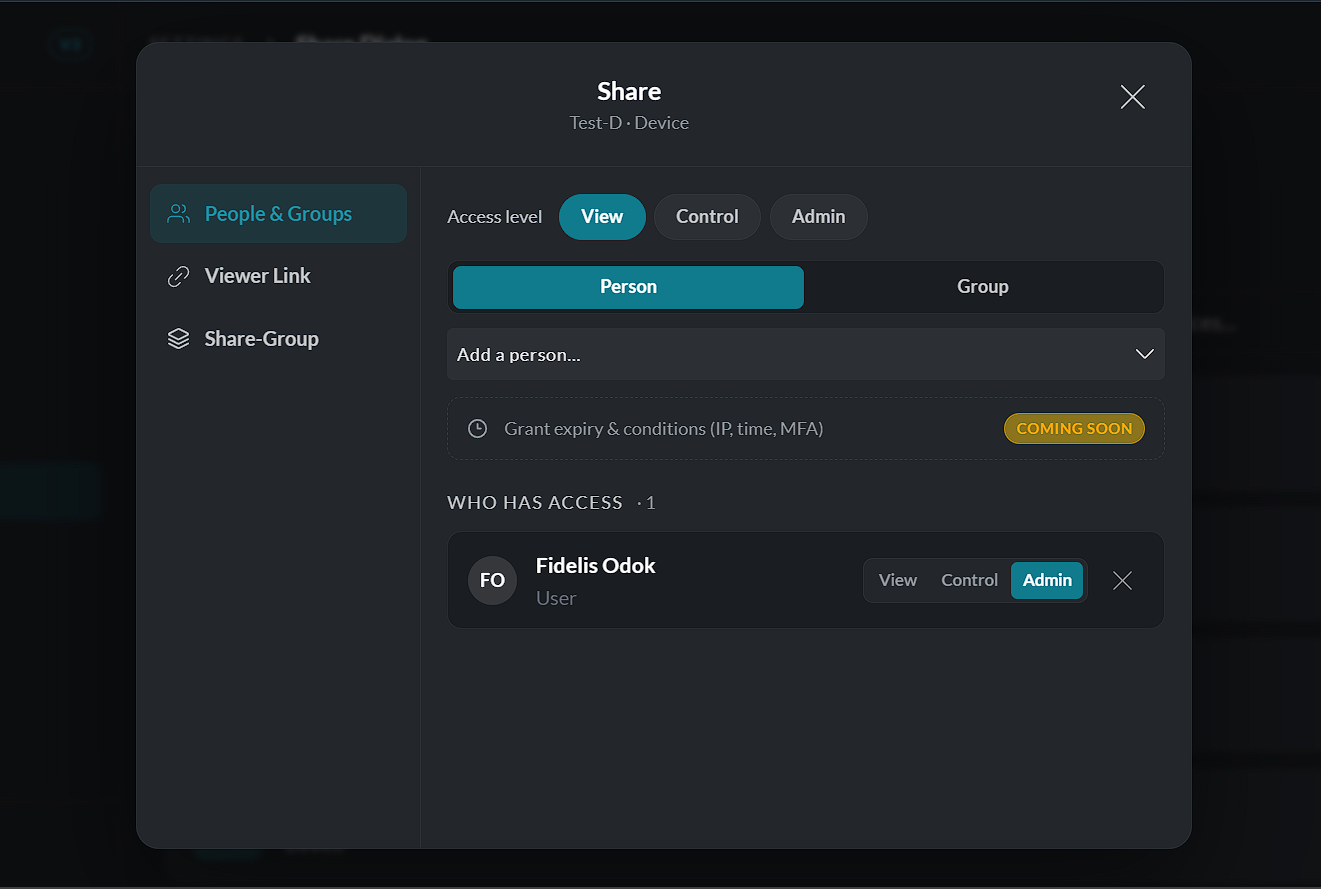
After clicking Share, the sharing dialog opens, allowing you to specify who should receive access to the selected resource.
Choosing Who to Share With
The platform supports sharing resources with different recipient types. Depending on your organization's configuration, you can share with:
- Individual users
- User Groups
- Share Groups
- Roles
- Other supported sharing targets
Use the recipient selector to choose the appropriate sharing target.
A search field is available to quickly locate users or groups by name.
Selecting Recipients
To add recipients:
- Search for a user or group.
- Select the required recipient from the search results.
- Repeat the process to add additional recipients if required.
Selected recipients are displayed within the dialog before the share is confirmed.
Recipients can be removed prior to saving if they were added by mistake.
Assigning Permissions
Each recipient can be assigned an appropriate permission level before access is granted.
Depending on the selected resource, available permissions may include:
- View – Allows the recipient to view the resource.
- Edit – Allows the recipient to modify the resource.
- Manage – Grants full management permissions for the shared resource.
Only permissions supported by the selected resource type are displayed.
Completing the Share
After selecting all recipients and assigning the required permissions:
- Review the sharing configuration.
- Click Share to grant access.
The selected users or groups immediately receive access according to the assigned permission level.
Note: Users can only grant permissions that are allowed by their own role and the permissions they already possess for the selected resource.